


Guided Fit Support for Your New Progressive & Bifocal Glasses
For perfect eyewear positioning, supported by experienced licensed opticians in the US, ready to assist you. Achieve unmatched comfort and precision with our innovative solution, redefining online eyewear support.


 4.7
4.7
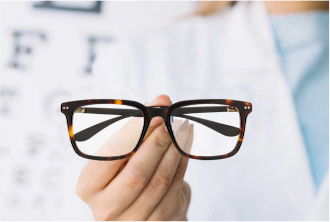
Visual Adaptation & Support Guide
-
-
Visual Adaptation & Support Guide
Your new glasses will come with a custom digitally printed adhesive layer tailored to your selected progressive lens design, frame choice, and unique measurements. This layer is programmed, cut out, and affixed to the lens, allowing for convenient try-on and post-care support.
Experience Optimal Results with Your New Glasses by Following These Step-By-Step Instructions Upon Their Arrival
-
-
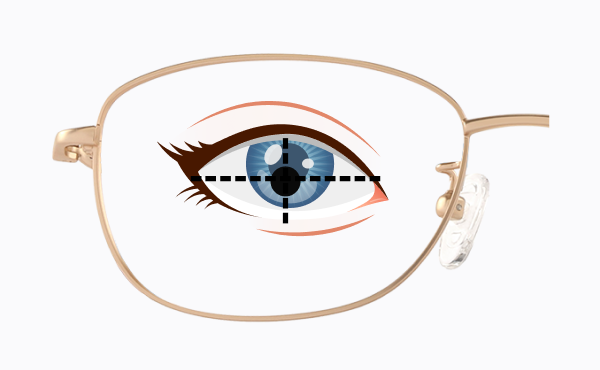
Step #1: Put on your glasses in front of a mirror. Raise or lower the frame on your nose bridge until the + fitting cross on the lens is aligned with your pupil.
 If the fitting cross does not align with your pupil even after
adjusting the frame by raising or lowering it, please skip to the
photo instructions provided and contact our customer service for
further assistance.
If the fitting cross does not align with your pupil even after
adjusting the frame by raising or lowering it, please skip to the
photo instructions provided and contact our customer service for
further assistance.
-
-
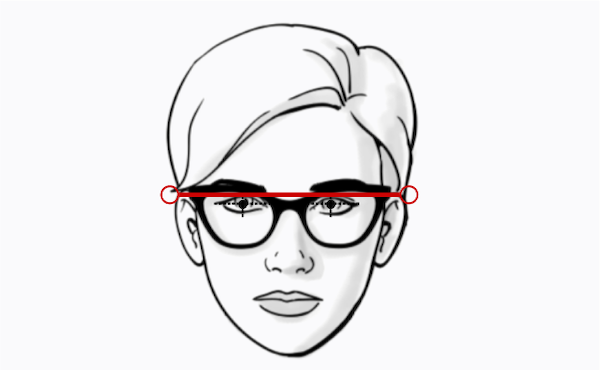
Step #2: Capture a photo of yourself wearing the glasses prior to sticker removal. This visual aid will enable our customer service team to offer precise troubleshooting support when needed.
 Ensure both ear's tops are visible and aligned with the tops of your eyes. Hold the
camera at eye level (or ask a friend to help) while positioning your face directly
forward, look directly into the camera for the photo.
Ensure both ear's tops are visible and aligned with the tops of your eyes. Hold the
camera at eye level (or ask a friend to help) while positioning your face directly
forward, look directly into the camera for the photo.

-
-
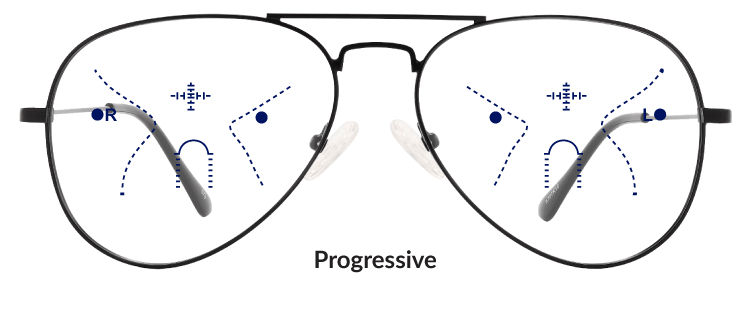
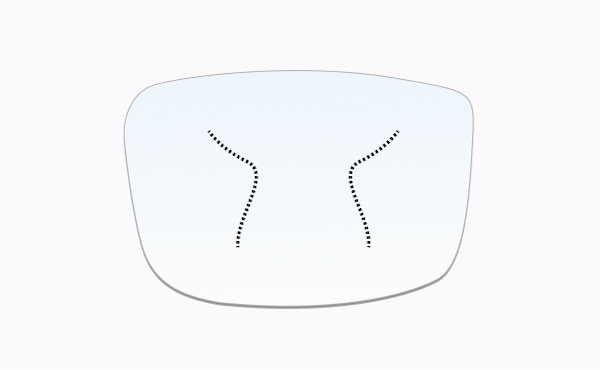
Step #3: Take note of the hourglass markings on the lens. Focus your gaze inside the hourglass, as this is where you'll find your perfect prescription for distance, mid-range, and near vision. It is important to avoid looking outside the hourglass area, as it may not provide clear vision.
As you adjust to progressive glasses, a helpful tip is to point your nose and turn
your head to optimize peripheral vision.
-

-
Step #4: Locate the inverted horseshoe marking on the lens. Below this marking, you will find the reading area of the lens designed to provide optimal clarity and focus for reading purposes.
A helpful tip for beginners to access the reading area is to slightly raise your
chin while simultaneously lowering your gaze.
After following these step-by-step instructions, feel free to remove the stickers, clean your lenses, and enjoy your new progressive or bifocal glasses.
-
Contact Us
Email: help@payneglasses.com Call: 412-800-2020 Text: 412-800-2020
Chat: Please click/tap the floating Help icon (only visible at lower-right corner when scrolling on every page).
-
We are available 10 AM to 9 PM Eastern Time ( 12 AM for chat ), Monday to Friday ( except public holidays ), and 1 PM to 6 PM Eastern Time on weekends. But don’t let this stop you! Please feel free to leave us a message on any channel and we will definitely get back to you the following business day!
We are available 10 AM to 9 PM Eastern Time ( 12 AM for chat ), Monday to Friday ( except public holidays ), and 1 PM to 6 PM Eastern Time on weekends. But don't let this stop you! Please feel free to leave us a message on any channel and we will definitely get back to you the following business day!